


Framing a shed is the backbone of any successful shed-building project. It's the process of constructing a sturdy skeleton that supports the entire structure, from the foundation to the roof. Proper framing ensures your shed can withstand the elements and provide reliable storage or workspace for years to come. But how to frame a shed?
Table of Contents:[hide]
In this guide, we'll walk you through each step of the shed-framing process, offering clear, easy-to-follow instructions to help you create a solid and durable structure.
Shed Framing Basics

Before getting straight to how to frame a shed, it's essential to first understand the basics.
Shed framing involves creating the skeleton or structure that will support your shed, including the walls, roof, and foundation. Proper framing ensures your shed is stable, secure, and able to withstand various weather conditions over time.
There are different types of framing methods, but the most common one is platform framing, which involves building the floor first, followed by the walls and roof. This type of framing is ideal for sheds because it provides a solid foundation and makes construction more manageable.
Also, you'll also need to understand key terms like:
- Plates: Horizontal boards that sandwich the studs at the top and bottom.
- Studs: Vertical two-by-four or two-by-six boards, typically spaced 16 inches on center.
- King studs: Full-length studs running from top to bottom plate, supporting jack studs.
- Jack studs: Shorter studs supporting headers on the inside of openings.
- Headers: Additional structure framing the top of window or door openings.
- Sills: Additional structure framing the bottom of window openings.
- Cripple studs: Short studs supporting framing above and below openings.
- Sheathing: Plywood or oriented strand board (OSB) that encloses the walls.
Familiarity with these terms will help you navigate the entire process more confidently.
Once you're comfortable with the basics, you can move on to the practical steps of framing your shed.
Start with a Shed Plan
Before you begin framing your shed, it's important to have a clear and detailed plan. A good shed plan helps you stay organized, avoid mistakes, and make sure you have everything you need before you start building.
Your shed plan should include the following:
1. Local Building Codes and Permits
Check your local building codes to see if you need a permit to build a shed. Go to your local government’s official website and check all the building codes. Some areas have rules about how big a shed can be or how close it can be to your property line. It’s best to find this out early so you don’t run into problems later.
2. Exact Measurements
Your plan should include the exact size of your shed—how long, wide, and tall it will be. This helps you buy the right amount of materials and makes the building process easier.
3. Door and Window Placement
Decide where you want to place your doors and windows. Think about how you’ll use the shed and where it makes the most sense to have an entrance or natural light.
4. Materials and Tools List
Make a list of all the materials and tools you’ll need. This includes lumber, nails or screws, plywood, and roofing materials. It should also include tools like a circular saw, drill, hammer, tape measure, and level. Having everything ready before you start saves time and reduces stress.
5. Roof Pitch and Style
Choose a roof style that works well for your shed and your local weather. A common roof pitch is 45 degrees, also called a 12/12 pitch. This means the roof rises 12 inches for every 12 inches it runs horizontally. This type of roof sheds water and snow easily and gives the shed a nice look.
If you're not sure how to create your own plan, you can find pre-designed shed plans online or at hardware stores. These plans often come with step-by-step instructions and material lists, and many can be adjusted to fit your needs.
Once you have your plan ready and have checked local building rules, you can move on to gathering materials and getting your site ready.
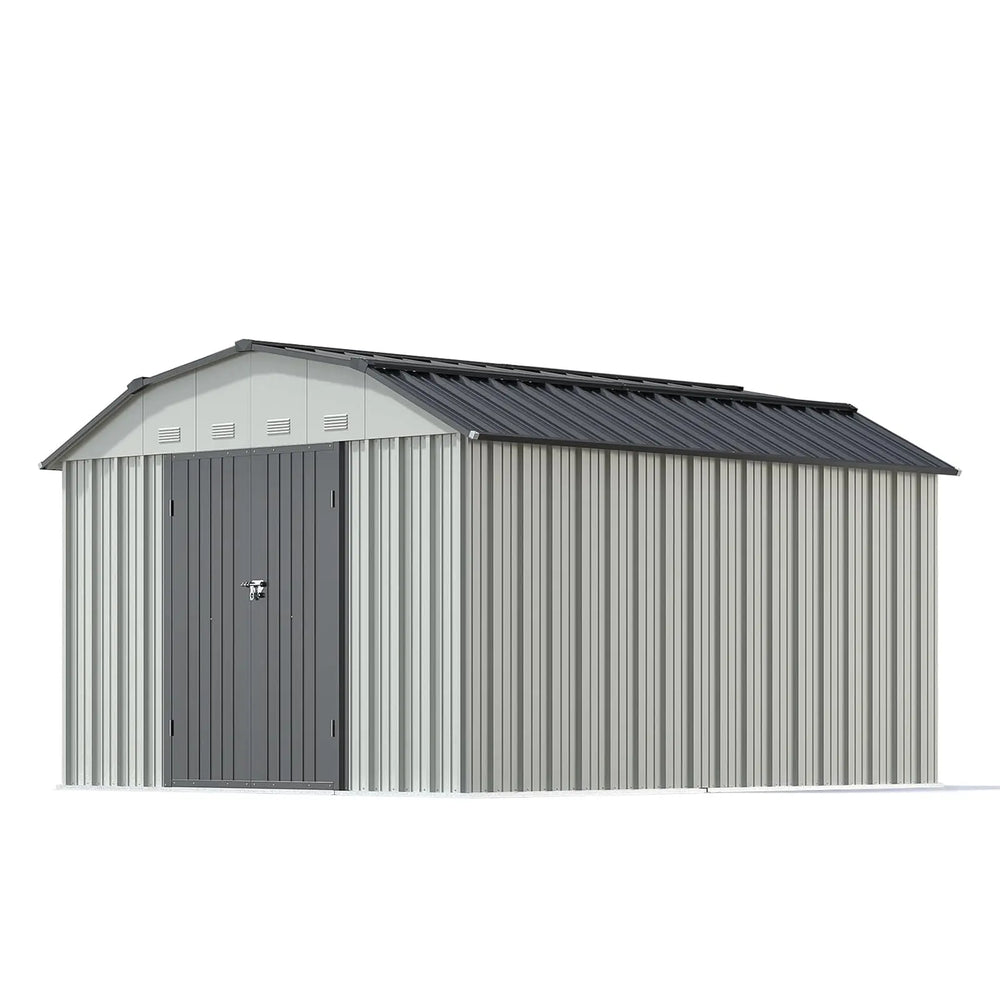
 Barn Style 10x12 Metal Shed Pro with Gambrel Roof
- Ideal for storing larger outdoor equipment or creating a workshop.
- Built with galvanized steel, it is resistant to rust, rot, and harsh weather conditions.
- Offers plenty of space for shelves, hooks, and other organizational solutions.
- The robust metal construction ensures long-lasting protection for your belongings.
Tools and Materials to Frame a Shed
It's important to gather the right tools and materials before getting started with frame building. Having everything ready at the start will save you time and frustration during the build.
Here's a list of what you'll need:
Tools:
- Measuring Tape: For precise measurements
- Level: To ensure everything is straight and even
- Circular Saw: For cutting wood
- Hammer or Nail Gun: To secure the framing components
- Power Drill: For making pilot holes and driving screws
- Ladder: To reach higher areas, like the roof
- Carpenter's Square: To ensure your cuts and joints are square
Materials:
- Pressure-Treated Lumber: For the foundation and framing
- Plywood: For sheathing the walls and roof
- Nails or Screws: For securing the structure
- Concrete or Gravel: For the foundation base
- Roofing Materials: Such as shingles or metal roofing
- Bracing Materials: To strengthen the walls and roof
Now that you have your tools and materials lined up, it's time to get started on the step-by-step process of framing your shed!
How To Frame a Shed
Framing your shed involves several key steps, each building upon the other to create a strong, durable structure. Follow these instructions carefully to ensure a successful build.
Step 1: Prepare the Site and Lay the Foundation
The first step in framing a shed is to prepare the site. Choose a level area with good drainage to prevent water from collecting around your shed. Remove any grass, weeds, or debris and, if necessary, level the ground using a shovel or rake.
Next, lay the foundation. This is a critical step for stability and longevity. You can either build a concrete slab or create a wooden foundation using pressure-treated lumber and gravel. Ensure your foundation is square and level to make the rest of the framing process easier.
Step 2: Install the Sill Plate
The sill plate is the bottom frame of your shed that sits directly on the foundation. It is typically made of pressure-treated lumber to resist moisture. Use anchor bolts or concrete nails to secure the sill plate to the foundation, ensuring it is level and square. This provides a solid base for the rest of the shed.
Step 3: Cut and Mark the Plates
Once the sill plate is secured, it's time to cut and mark the plates. Plates are the horizontal beams that run along the top and bottom of the walls. Use your measuring tape and carpenter's square to mark accurate measurements for your cuts. Cut the plates to the required length, making sure they fit snugly between the corners of your foundation.
Step 4: Assemble the Wall Frames
With the plates cut and marked, it's time to assemble the wall frames. Lay the bottom and top plates flat on the ground and start adding the vertical studs. These should be spaced evenly, typically 16 or 24 inches apart, depending on your shed plan. Secure the studs with nails or screws, and double-check that everything is square.
Step 5: Raise and Secure the Walls
Once the wall frames are assembled, it's time to raise them into position. With the help of a friend, lift each wall into place and secure it to the sill plate using nails or screws. Ensure the walls are straight and plumb (vertical), and use a level to check for accuracy.
Step 6: Install Diagonal Bracing
To keep your walls from shifting or bowing, install diagonal bracing. This can be done by adding angled wood braces across the walls or using metal corner brackets. Bracing adds stability, especially during the construction process, and ensures the walls remain square and secure.
Step 7: Install Rafters
Next, you'll install the rafters for your roof. These are the sloped beams that will support the roof sheathing and covering. Begin by measuring and cutting the rafters to the required length. Then, secure them to the top of the wall frames, spacing them evenly according to your shed plan. Ensure they are level and properly aligned to create a strong roof structure.
Step 8: Install Roof Sheathing and Covering
Once the rafters are in place, it's time to install the roof sheathing. Plywood or OSB (Oriented Strand Board) is commonly used for sheathing. Cut the sheets to fit the rafters and secure them with nails or screws. This provides a solid base for the roofing material. After the sheathing is installed, you can apply a roof covering, such as shingles or metal roofing, depending on your preferences and budget.
Step 9: Add Roofing Materials
Finally, finish off your roof by adding the roofing materials. Start at the bottom of the roof and work your way up, overlapping each row of shingles or roofing panels to prevent leaks. Ensure all seams are sealed, and if you're using shingles, nail them down securely. You may also want to add a ridge cap at the peak of the roof to protect the top edge from water damage.
With the roof completed, your shed frame is nearly finished! The last steps will include adding finishing touches like doors, windows, and exterior siding, which will make your shed functional and visually appealing.
Conclusion
Framing a shed may seem like a big task, but with the right plan, tools, and steps, it's a project that anyone can tackle. From preparing the site to adding the finishing touches on the roof, each step is important to ensure your shed is sturdy and durable.
By following this guide, you now have a clear understanding of how to frame a shed and can confidently start building your own. Remember, take it one step at a time, and don't rush. With patience and careful work, you'll have a shed that will serve you well for years to come.
Diana Mason
Hi there! I’m Diana Mason, the chief editor of Patiowell brand. With over 15 years of diving deep into the world of outdoor furniture, I’ve developed a keen eye for what makes outdoor spaces truly special. I love sharing tips and inspiration to help you create your perfect backyard retreat. Our blog is a reflection of my passion and expertise, featuring only the best pieces that I personally vouch for. Thanks for stopping by—I can't wait to help you transform your outdoor living space!
Leave a comment
All comments are moderated before being published.
This site is protected by hCaptcha and the hCaptcha Privacy Policy and Terms of Service apply.